Instructions:
Step
1
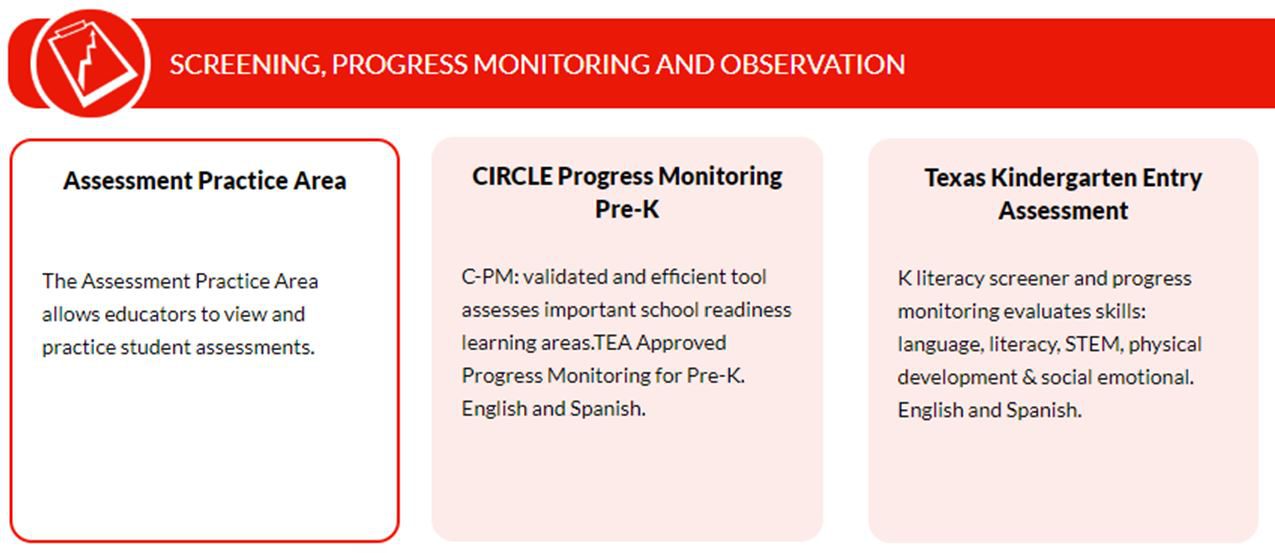
Locate the red banner Screening, Progress Monitoring and Observation on the dashboard and click on the assessment for which you would like to produce reports, for example CIRCLE Progress Monitoring PreK or Texas Kindergarten Entry Assessment. The following screenshots show the steps to pull this report in CIRCLE Progress Monitoring, but the steps are the same for all the assessments on CLI Engage.
Step
2
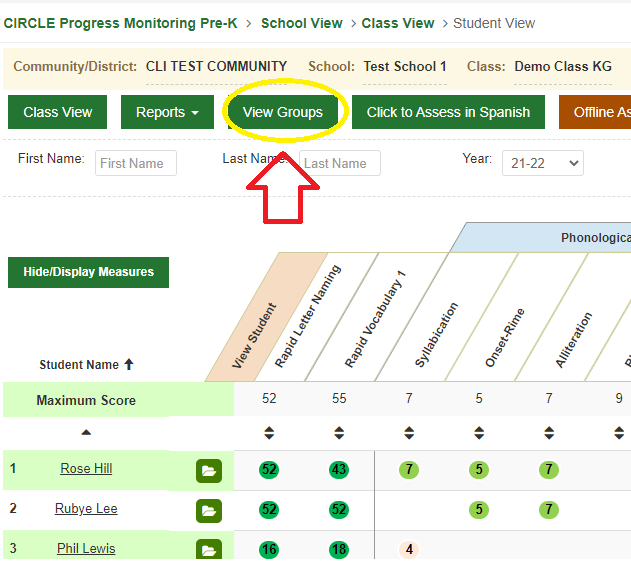
Click on View Groups:
Step
3
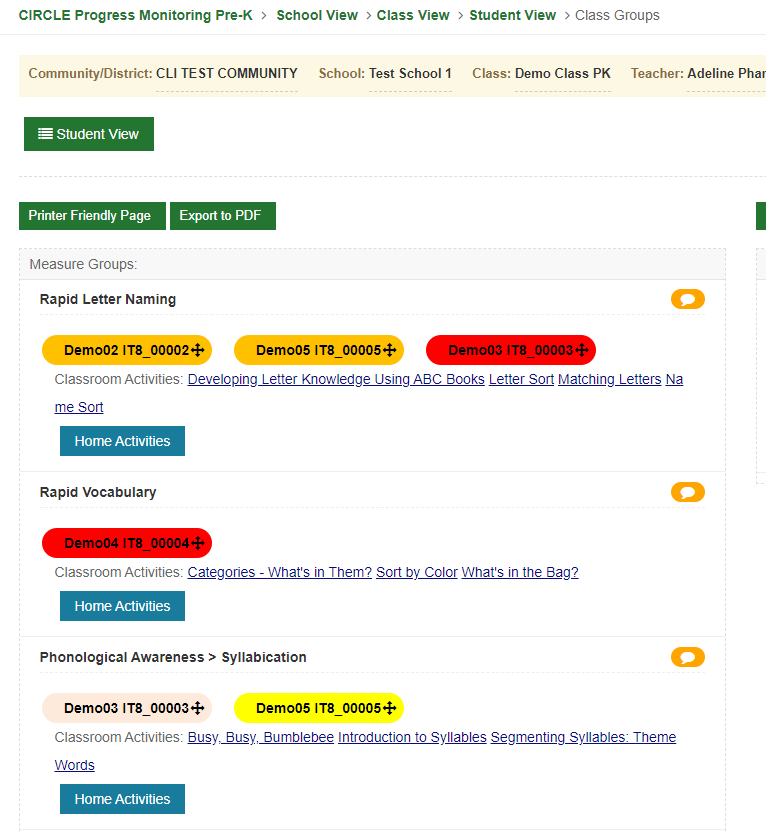
Next, you will see how the grouping tool breaks children into groups based on their assessment results. The groups will contain children that have not yet reached the “satisfactory” level for each skill.
Step
4
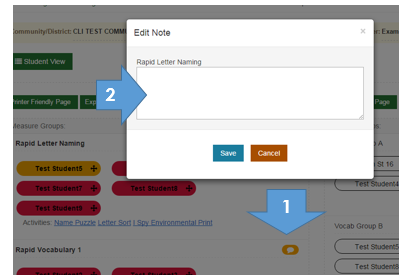
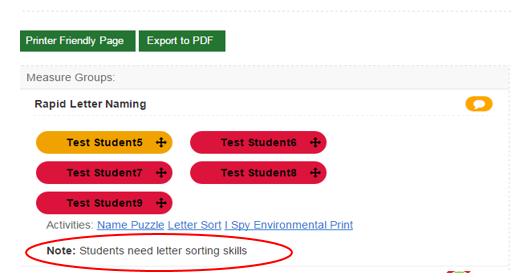
Click on the comment bubble to add a note to the grouping tool results:
Step
5
Your note appears once it is saved:
Step
6
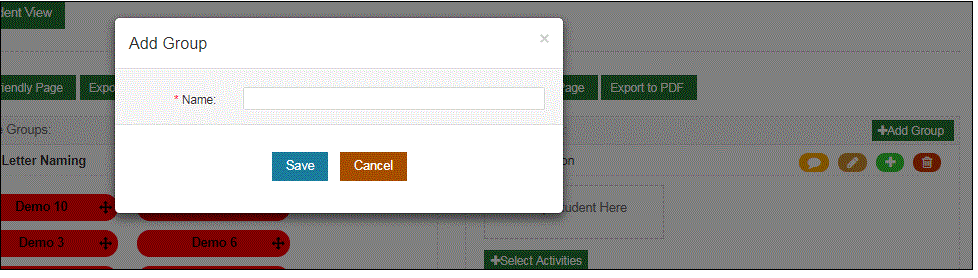
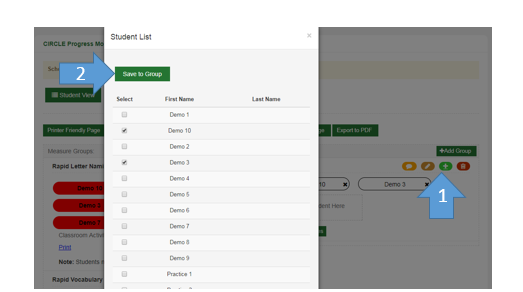
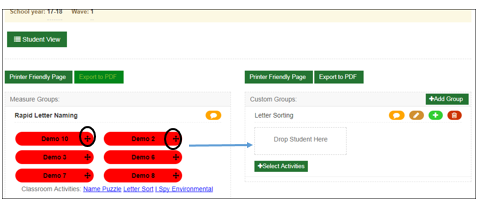
To create a custom group click on the ‘Add Group’ button. Add a name for this group and click ‘Save’.
Step
7
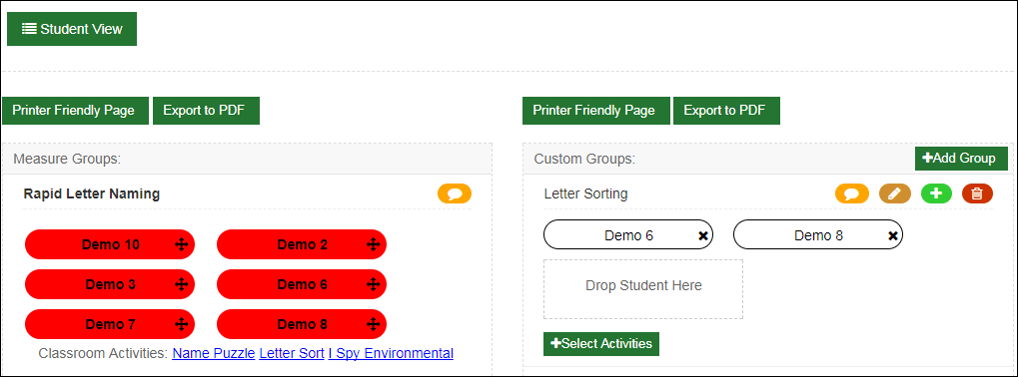
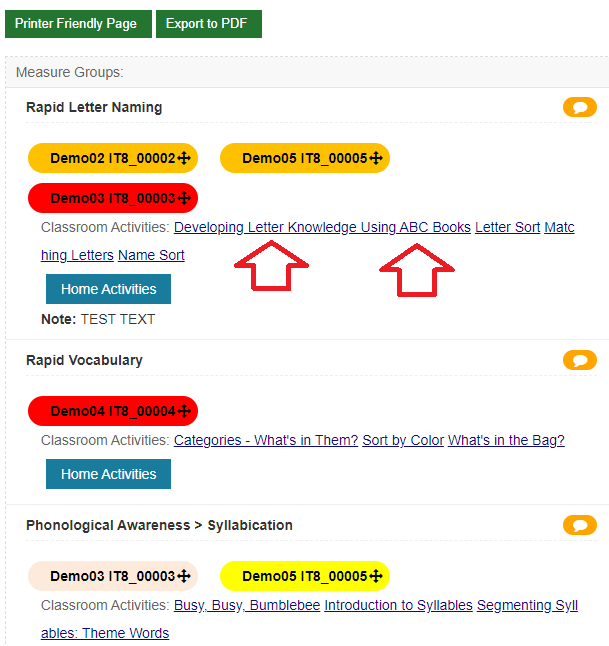
Create a custom group from the list of names of children who were below benchmark(in red). In the example below you can see that Demo 6 and Demo 8 students have been moved to the the Letter Sorting custom group.
Step
8
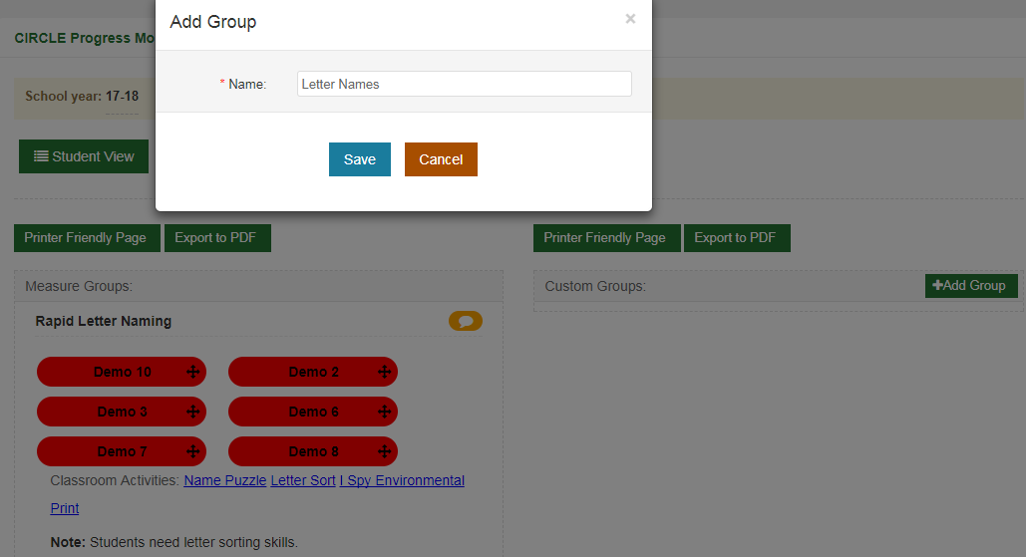
Add a name for the custom group and click ‘Save’:
Step
9
You can also create a customized group that may include children from the class who were NOT in red.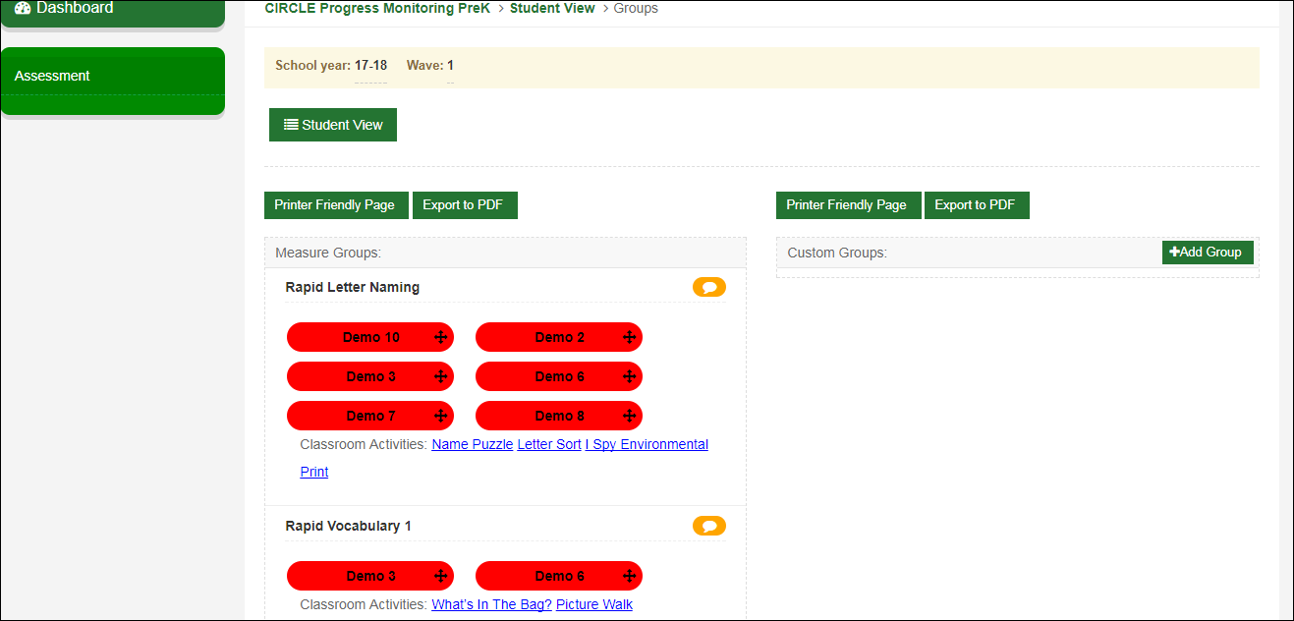
Step
10
To select children from the class who were not in red, first click on the plus sign icon. A list of the entire class will appear. Then, click on any of the children who you would like to be in the customized group.
Step
11
To drag and drop, click on the plus sign to move the learner to the customized group.
Step
12
To view as a report, click on Printer Friendly Page or Export to PDF to save to your desktop:
Step
13
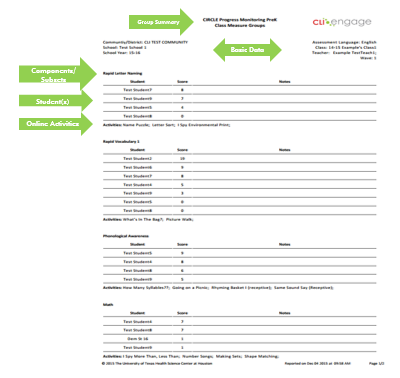
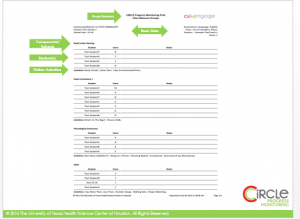
This is the PDF version of a group summary report that has been created.
Step
14
For more detail, click on the ‘Classroom Activities’ that can be found by clicking the link to the CIRCLE Activity Collection:
Step
15
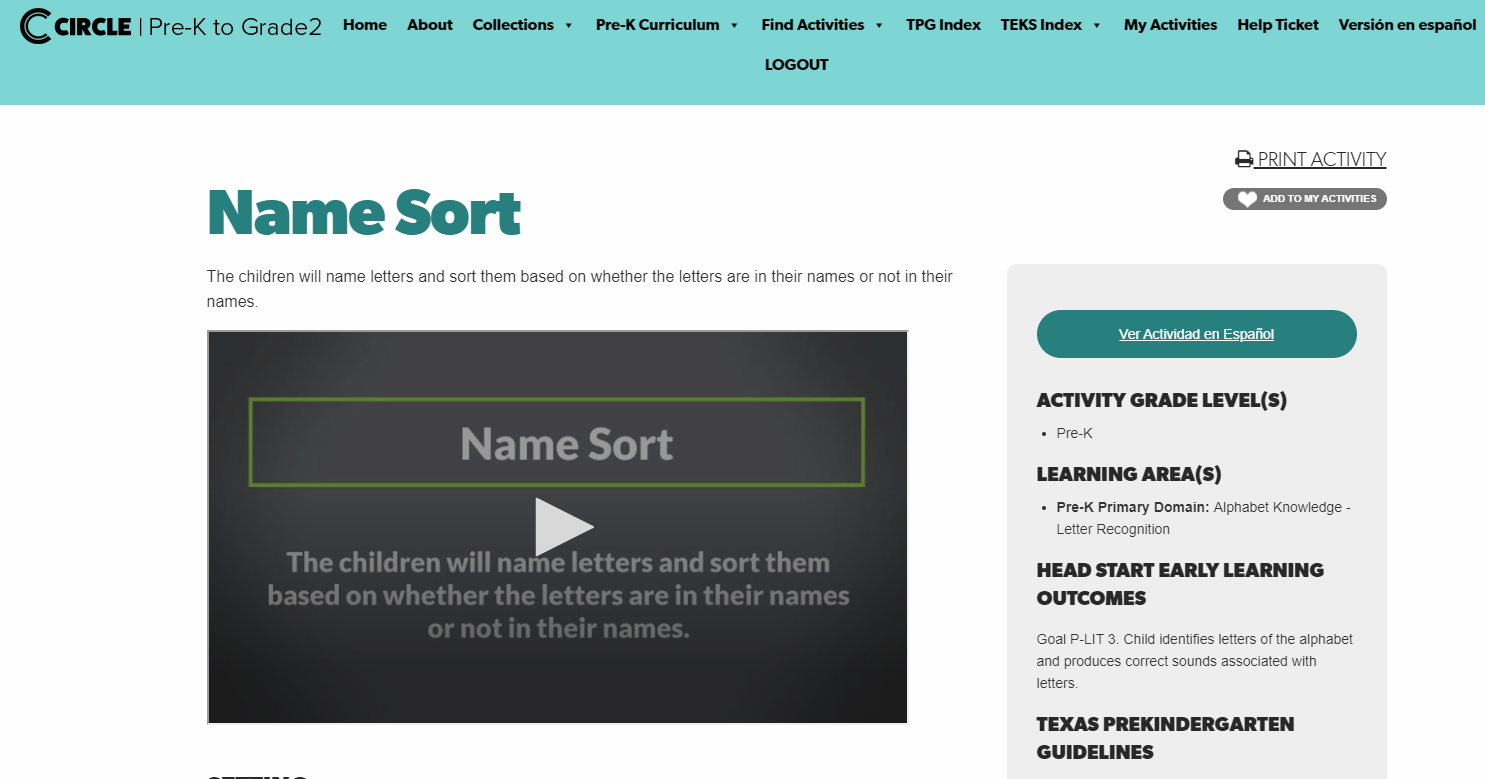
View of the CIRCLE Activity Collection:
This document was last modified on: November 19, 2021