The Continuous Quality Improvement Plan (CQIP) tool is designed to support Texas Rising Star (TRS) mentors in working with childcare programs to continuously improve the quality of their practice. Mentors can use this tool to assign goals to TRS directors and staff, write action plans, and document progress. The tool then generates a report for the mentors, staff, and directors to use to complete the CQIP and track progress over time. The following steps explain how to access and use the Continuous Quality Improvement Plan (CQIP) tool under Quality Improvement and Innovation in CLI Engage.
Instructions:
Step
1
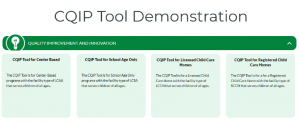
Go to the CLI Engage Dashboard, and scroll down to the Quality Improvement and Innovation section. There are 4 CQIP Tools, one for each facility type. Click the CQIP tool for your desired facility type.
Step
2
Enter school name in the “School Name” search bar and select search. Use the other search fields as necessary to narrow your search.
Find your school under “School Name”.

Step
3
After identifying the school, click on the black arrow under “Action” to proceed to your school’s folder page.

Step
4
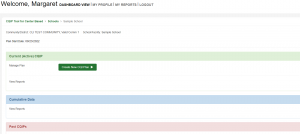
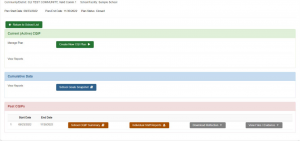
You are now on the School Folder page for the school. Here you will find your school information and CQI plan components. Click the green “Create New CQI Plan” button to open a CQI plan. If the school has an active CQI plan, skip to step 12.
Step
5
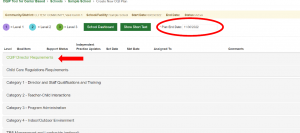
There will be 8 goal setting areas in the tool. Click an area of goal setting to see the goal statements included in that area.
Step
6
Goal statements are color-coded by priority level. Level 1 are foundational quality items that should be prioritized first, and levels 2 and 3 build to progressively higher levels of quality. Refer to the color key at the top of the goal-setting page.
Click on “Show Full text” at the top of the goal-setting page to see the full description of each goal statement.
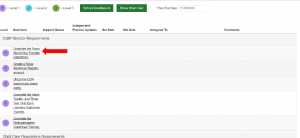
To set a goal, click on the hyperlinked goal item. The assign goals page will pop up on your screen.
Step
7
Notice at the top right corner of the assign goals page there are two options to view your staff that have met or not met this goal. You can click on the circle buttons to toggle between the two views.

Step
8
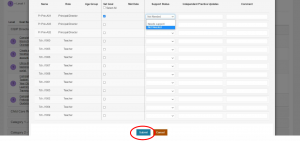
Step 8: On the assign goals pop-up window, click the check box under “Set Goal” next to the staff members you would like to assign to that goal. If this goal applies to all staff, check the box next to “Select All” at the top of the pop-up window.
Note: Next to each staff member, you will also have the option to change the support status, document an independent practice update, and make a comment. Please view the CQIP Manage Status Features User Guide for instructions on how to use these fields.

Click the “Submit” button at the bottom.
Step
9
You will now see the names of the staff members you assigned to each goal listed under the “Assigned To” column. The date you set the goal (today’s date) will be filled in under the “Set Date” column.
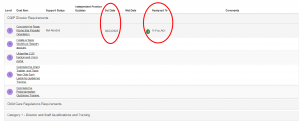
Repeat steps 6 -8 to select goals and targets for your teachers.
Step
10
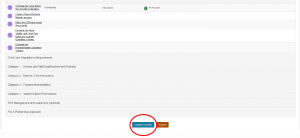
After you have completed selecting goals, click on the “Create CQI Plan” button at the bottom of the screen. Note that you will not be able to edit goal selections after clicking this button.
Step
11
A pop-up will let you know the page has been saved. Click the “OK” button, and you will be taken to an action planning page. At the top of the page, you can see the goals you selected along with the assigned staff. Scroll down to see the Action Plan fields.

Step
12
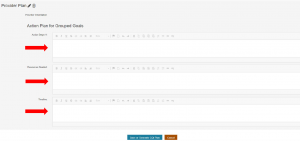
Use the Action Plan fields to document your action plan. Please see the Continuous Quality Improvement for Texas Rising Star: Implementation and Mentoring Guide for sample action plans and further guidance on what to enter in these fields.
- In the Action Steps box, enter details about the mentoring activities that will be executed during this plan.
- In the Resources Needed box, document any resources the program will need to execute the planned mentoring activities.
- In the Timeline box, enter any expectations around the timeline the mentoring activities will be executed on.
- In the Additional Comments box, enter anything else you would like to communicate.
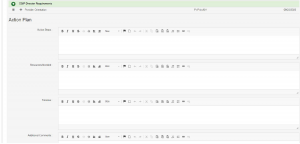
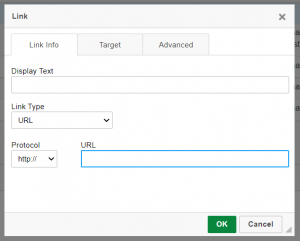
Note: Use the “Link” tool to add the hyperlink to an online resource into the Action Plan. ![]()
This quick step ensures the CQIP report includes active hyperlinks to share with directors and teachers.
Step
13
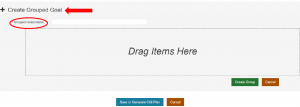
You also have the option to create action plans based on goals. If you would like to create an action plan that is tailored toward a group of goals, click on the plus sign next to “Create Grouped Goal.” Enter the name that describes that group of goals in the “Grouped Goals Name” field.
Step
14
Drag the goals from the top of the page and drop in the area labeled “Drag items here.” After you have dragged and dropped all the goals you would like to include, click on the “Create Group” button.

Step
15
You will now be able to see the “Action Plan for Grouped Goals” area pop up underneath your grouped goals. Complete these fields for that grouped goal. See above for details on what belongs in each field.
Step
16
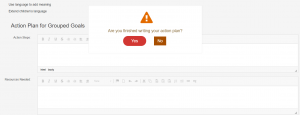
To continue, click the “Save or Generate CQIP Report” button at the bottom of the page. You will be asked, “Are you finished writing your action plan?”
- Click “Yes” to close out the action plan and return to the School Folder page
- Click “No” to continue editing or add additional group goals
Step
17
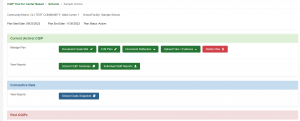
You can now access the CQIP school summary and staff reports and the School Goals Snapshot report.
- Click “School CQIP Summary” to see the action plan and resources for the entire school.
- Click the “Individual Staff Reports” button to see the individualized reports for the staff with their specific goals and resources.
- Click the “School Goals Snapshot” button to see a chart with the set/met status for all goals in your school
Step
18
To document progress on goals met, click on the “Document Goals Met” button.

Step
19
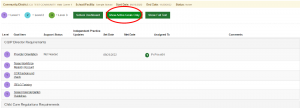
You will now be taken to the Document Goals Met page, which looks similar to the goal-setting page. Click the “Show Active Goals Only” button to see only the goals that you selected during this CQIP plan.
Step
20
You will now be taken to the Document Goals Met page, which looks similar to the goal-setting page. Click the “Show Active Goals Only” button to see only the goals that you selected during this CQIP plan.

Step
21
Notice at the top right corner of the pop-up window that there are three options to view your staff: staff who have this goal set, staff who have met this goal, and staff who have not set or met this goal. You can click on the circle buttons to toggle between the three views.

Please note, next to each staff member, you will also have the option to change the support status, document an independent practice update, and make a comment. Please view the CQIP Manage Status Features User Guide for instructions on how to use these fields.
Step
22
You will see a pop-up window with all of the targets assigned to that goal. Click in the “Met Date” field next to each target to insert the date that they met their goal. If a target has not yet met the goal, leave the field blank. Click “Submit” to save. The “Met Date” field will now be populated with the most recent met date for that goal statement.

Step
23
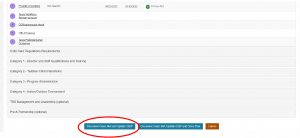
After you are complete documenting progress, click the “Document Goals Met and Update CQIP” button to save your changes if you’d like to keep this CQIP plan active.
Step
24
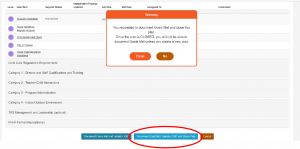
If you are complete with the CQI plan, or you have reached the CQI plan end date, click the “Document Goals Met, Update CQIP and Close Plan” button. You will see a pop up asking you to confirm your selection. Clicking “Close” will close out the current CQI plan, and you will be required to create a new plan for that school.
Step
25
After closing a CQI Plan, you will be returned to the School Folder page. You now have the option to create a new CQI Plan by clicking the “Create new CQI Plan” button. Historical documents from your previous plans are still available on this page under the “Past CQIPs” section.
This document was last modified on: September 28, 2022
